 In celebration of Zé's first Halloween and the lumberjack hat/beard I crocheted for him, I put together the above graphic and thought it'd be fun to share how I made it.
To accomplish the clean white background, normally I would shoot on white seamless (lit to delicious pure white perfection), but my studio gear is currently packed in moving boxes (yes, still), and I didn't want to mess with setting up hot shoe flashes, so I put together this low-tech and super easy solution using only available light (and set-up took all of 30 seconds!).
I photographed him on 30x40 white foam board (sold in a 10-pack which is GREAT because they are handy for so many things!), sitting about where you see the dragon in the photo below. I used one piece for him to sit on, another behind him (propped up by a basket), and a third piece opposite the window to bounce the light and fill in some of the shadows. You can see the set-up in the photo below.
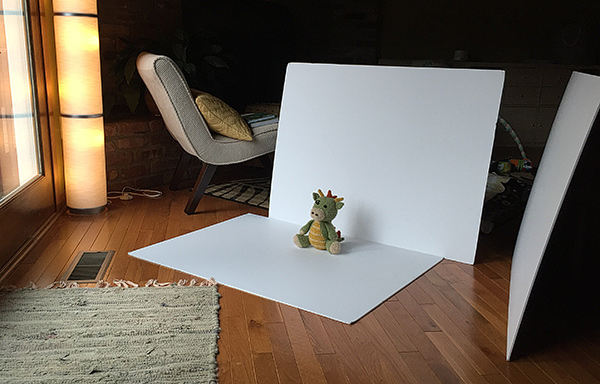
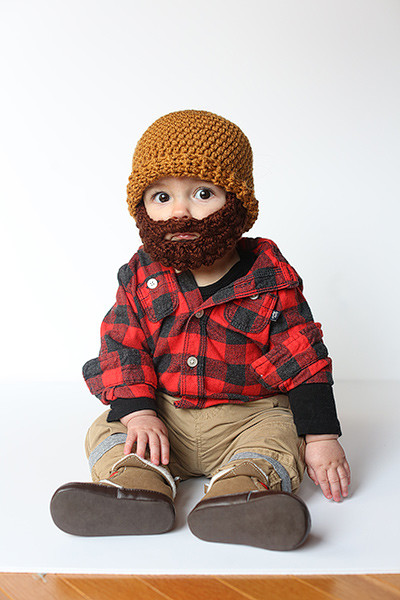
The photo below is the result straight out of camera (SOOC). Because I was using only available window light coming from the front/left, I wasn't able to blow out the background by over exposing it the way you easily could in the studio. Thus, we can see the seam where the floor board meets the background board, requiring a small adjustment. (And, that's our wood floor peeking out from below the foam board at the bottom of the photo.)
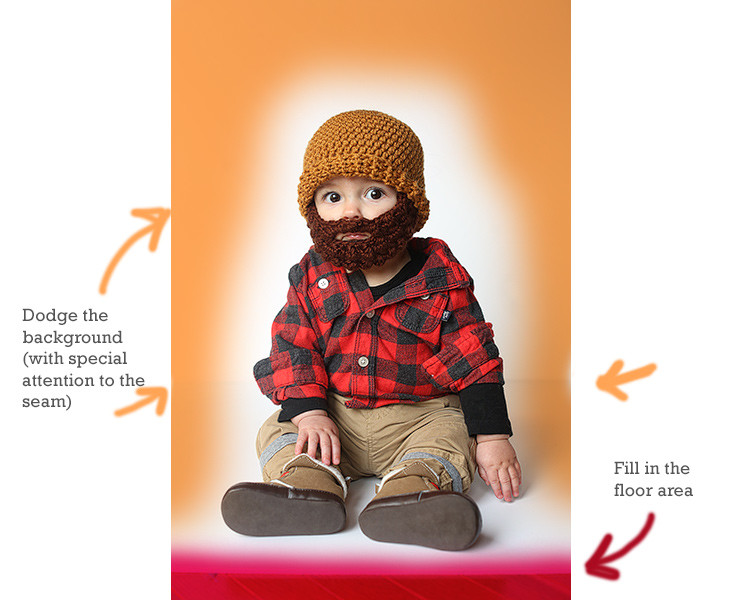
I used the Dodge Tool (O) to clean up the background, paying special attention to the seam where the two boards come together. To fix the floor, I used the Eye Dropper (I) to sample the white near the bottom of the foam board and the Paint Brush (B) to simply paint over the wood floor.
Working with white backgrounds can be tricky when you're not shooting them in the studio. Dodging can make things appear to be in order, but if you view the image on various screens from certain angles, you might see your brush strokes. To prevent this, I like to add a temporary Levels Adjustment Layer which I purposely destroy with a severely exaggerated midtone adjustment, which shows me any spots I may have missed with the Dodge Tool, as seen below. To fix any errant background information, I simply dodge the background layer while the Levels Adjustment Layer is still active, effectively checking my work as I go. When I'm finished, I drag the adjustment layer to the trash.
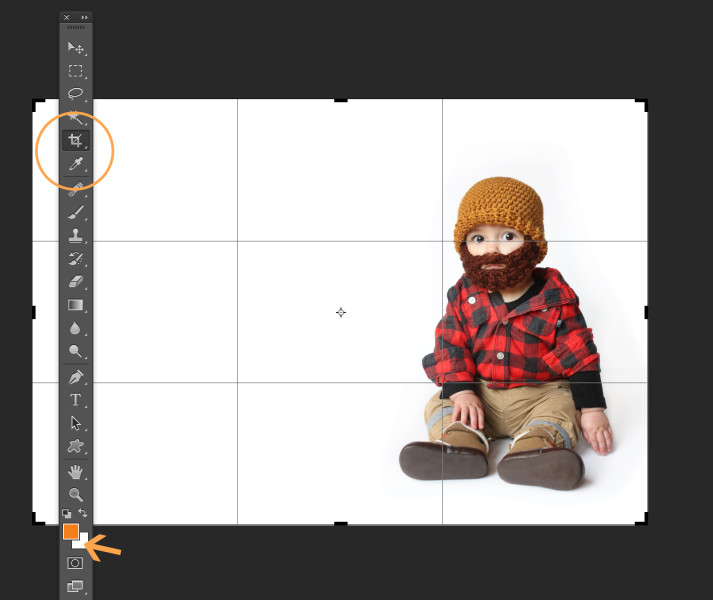
 Once the background was cleaned up, I used the Eye Dropper Tool and Option/Alt clicked to load the white background color as my active background swatch. Then, I switched to the crop tool to resize the whole image. (You can leave the settings blank and just drag from the corner to visually adjust the canvas area, or enter specific dimensions if you know what size you want the final piece to be.) Photoshop will fill in the canvas area with whatever color you sampled for your background swatch when you Option/Alt clicked with the Eye Dropper. This makes it possible to use the crop tool to essentially reformat the image and extend the background, creating room for our design. If you did a good job of cleaning up the background area, it should appear seamless.
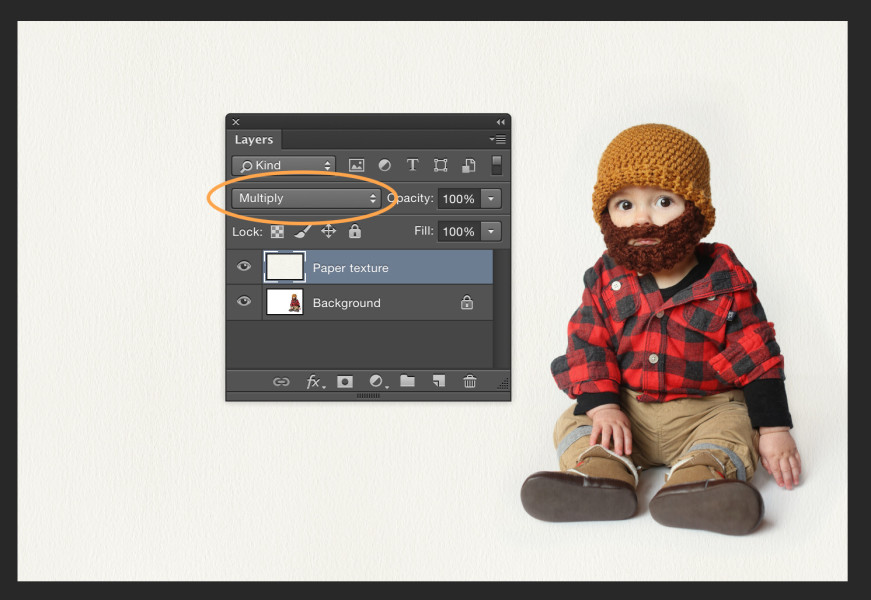
To create a more organic feel, I opted to add some paper texture to the design. You can use any kind of texture file you want. I used paper48.jpg from this Give Me Some Papers Quick texture collection by Nicky Laatz. After making sure the texture file was sized appropriately for my image, I dragged it into the composition and changed the layer's Blend Mode to Multiply.
Next, I added two text layers using Monster and Rockwell typefaces and used the Eye Dropper Tool (I) to select the text colors from within the image itself. Finally, I added the spider web graphic (again, changing the layer Blend Mode to Multiply) to finish the design.
And that's it—frightfully simple!

 If you'll be in the Seattle area July 11th, you could join me in the Creative Live studio for the Beginner Photographer's Crash Course! We'll be covering everything you need to know to feel more comfortable poking around your camera settings to achieve consistently better results. Together, we'll show your camera who's boss. Let's do this!


