
How to Use Stackable Fonts in Photoshop
/Stackable fonts are as fun as they are jam packed with possibility.
If you’re not sure what a layered or stackable font is—let alone how to use them—you’re in the right place.
Any stackable font will work, so have fun exploring all the amazing options out there. Of course, each collection will feature different kinds of styles, designs, and options, so what I’m showing you here applies to the specific font I’m using (Bimbo), but the process is similar no matter which font you choose to work with.

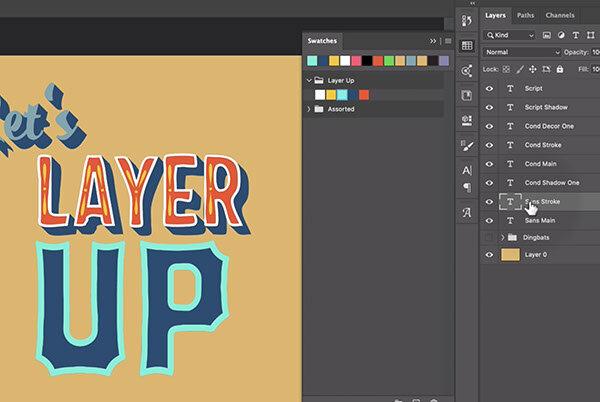
Here you can see that our design consists of three words, each on their own layer. I’ve titled each layer with the name of the applied font from the subset of the Bimbo typeface.
The Bimbo typeface is unique in that it contains a whole bunch of different font subsets. The word “Let’s” has the Script subset font applied to it (as titled in the Layers panel).
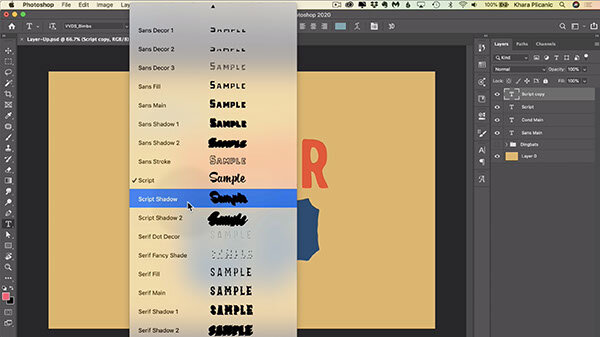
We’ll start by duplicating the Script layer (CMD/CTRL+J). Then, from the font subset menu, select Script Shadow.

Change the color to navy blue (#224d73), drag the layer below the Script layer, and rename it, “Script Shadow.”

Moving on to the word “Layer,” (set using the Condensed Main typeface) target the “Cond Main” layer. Duplicate it (CMD/CTRL+J), then from the font subset menu, select Condensed Stroke.

Change the color to white (#ffffff) and rename the layer, “Cond Stroke.”

Duplicate the “Cond Stroke” layer (CMD/CTRL+J), and change the font subset to Condensed Decor One.

Isn’t that fancy? Change the color to yellow (#f5c80c) and rename the layer, “Cond Decor One.”

Duplicate the “Cond Decor One” layer (Cmd/Ctrl +J), and this time change the font subset to Condensed Shadow One.

Drag the layer below the “Cond Main” layer (shadows go behind, obv.) and change the color to the same navy blue as before. (You can press I on your keyboard (for the eye-dropper tool) and sample the navy blue if you don’t want to have to type in the #224d73 code again, just remember to switch back to the Type tool when you’re done.) Rename the shadow layer, “Cond Shadow One.”

The last word, “Up,” has the Sans Main font subset applied. To duplicate it, select the “Sans Main” layer in the layers panel and press Cmd/Ctrl +J. Change the font subset to Sans Stroke.
Change the color to aqua (#63f2d8) and rename the layer, “Sans Stroke.”
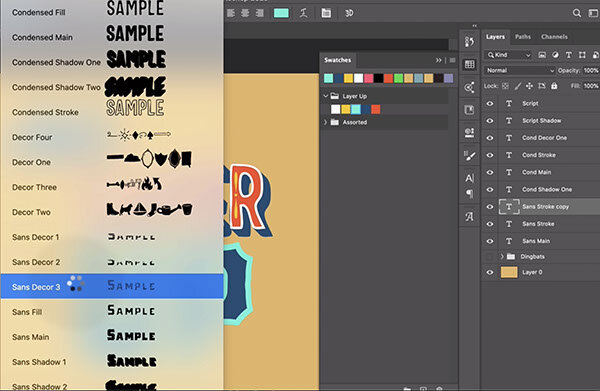
Duplicate the “Sans Stroke” layer (Cmd/Ctrl+J) and change the font subset to Sans Decor 3.

Change the color to white (#ffffff) and rename the layer, “Sans Decor 3.”

Duplicate the “Sans Decor 3” layer and change the font subset to Sans Shadow 1.
Drag the layer below the “Sans Main” layer and change the color to red (f24e29).

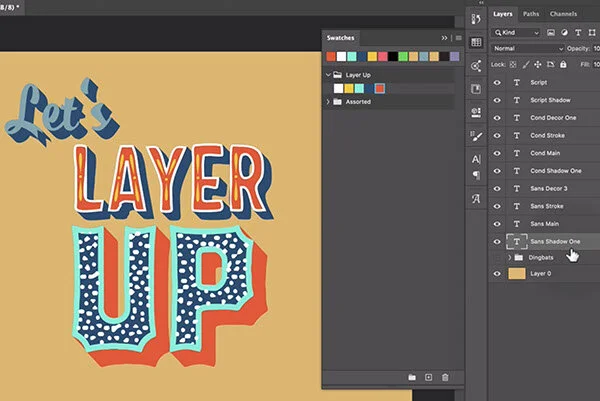
Now we’ll finally get to see what that second shadow is all about! Duplicate the “Sans Shadow One” layer (Cmd/Ctrl+J) and change the font subset to Sans Shadow 2.

Lower the layer opacity to 15%.

Drag the layer below the “Sans Shadow One’ layer, change the color to navy blue (#224d73), and rename the layer, “Sans Shadow Two.”

At this point, I toyed around with the addition of several dingbats from the various included “Decor” font subsets the Bimbo typeface includes.

To give it a try, use the Type tool to create a new, blank type layer. Then open the Glyphs panel (Window>Glyphs). Select the Bimbo typeface from the drop down menu at the top-right, then select the various font subsets from the dropdown menu to the right. In this image you can see the “Decor Three” subset chosen.
Then, with an active cursor awaiting you to start typing, double-click any of the dingbat glyphs from the glyphs panel to insert it into your type.
YOU DID IT!!! BRAVO!


